Follow Me On Social Media!

BBQ Pulled Mushroom Sliders: The Ultimate Plant-Based BBQ Delight
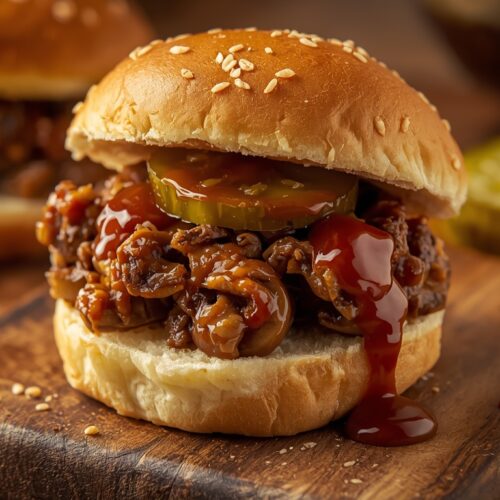
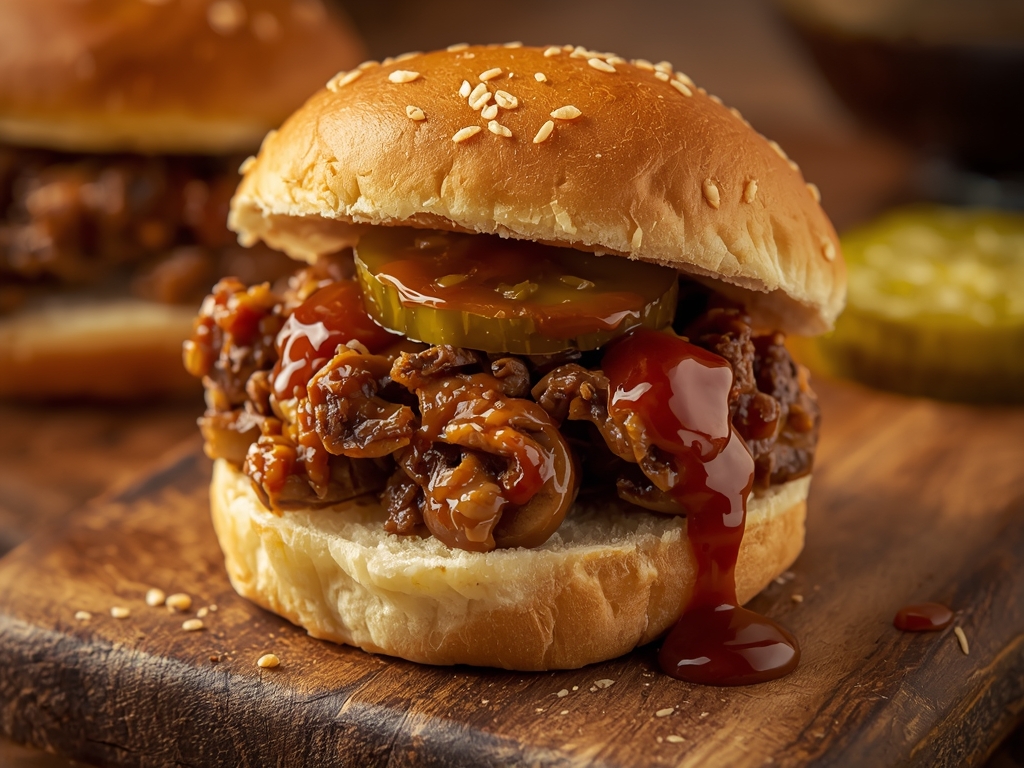
Sink your teeth into these BBQ Pulled Mushroom Sliders, a mouthwatering plant-based twist on classic BBQ. Packed with savory, smoky flavors and a satisfying meaty texture, these sliders are perfect for summer gatherings, game nights, or a cozy dinner. Made with a mix of portobello and cremini mushrooms, coated in rich BBQ sauce, and topped with pickles and red onion, they’re a crowd-pleaser for vegetarians and meat-lovers alike. Easy to prepare and endlessly customizable, these sliders are your new go-to for flavorful, satisfying meals.
Ingredients
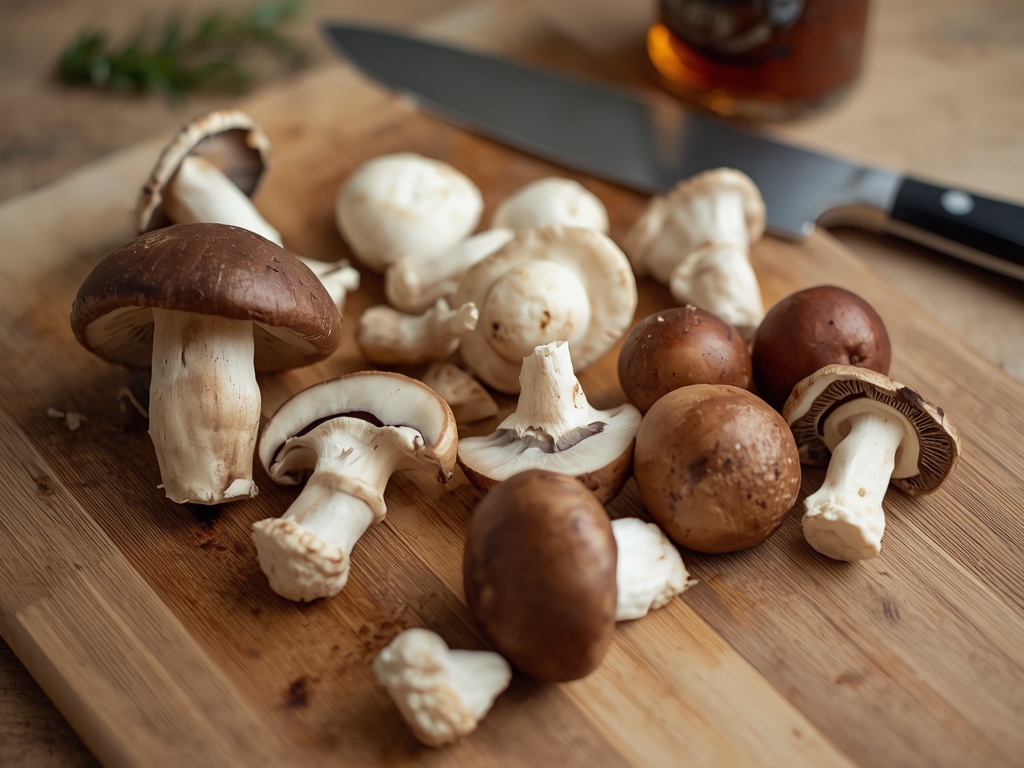
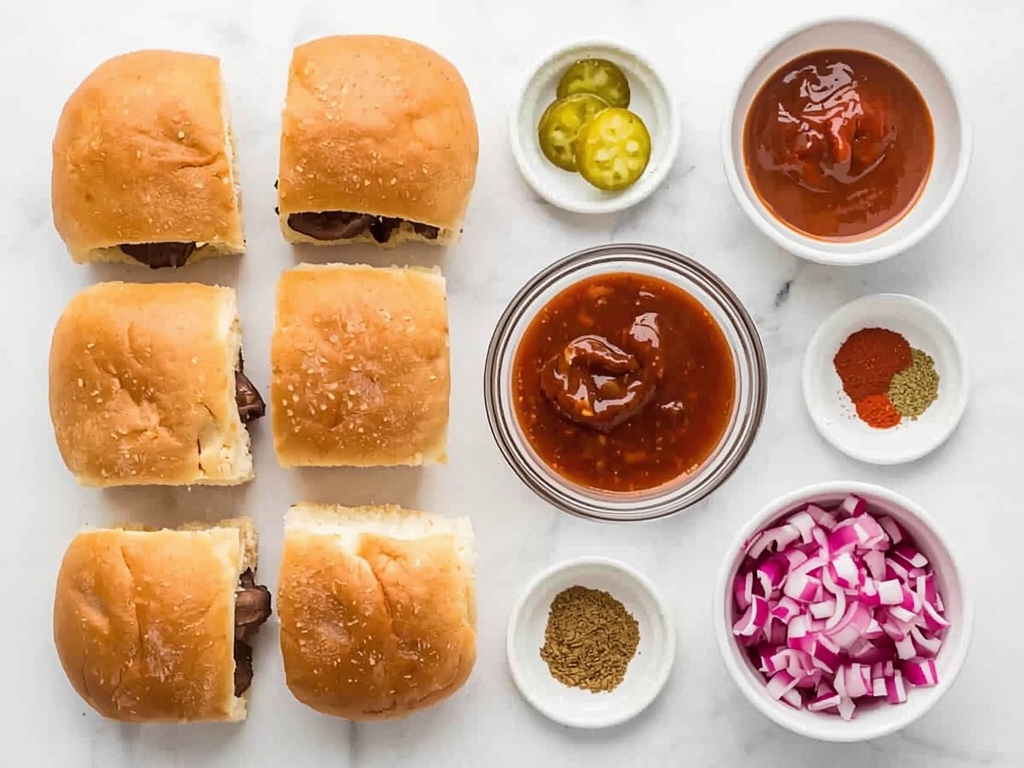
- 2 lbs mixed mushrooms portobello, cremini, shiitake
- 1 cup BBQ sauce
- 12 slider buns
- 1 cup sliced pickles
- 1 red onion, thinly sliced
- 2 tbsp olive oil
- 3 g arlic cloves, minced
- Fresh cilantro (optional) optional
Instructions
- Preheat oven to 350°F. Clean and slice mushrooms. Heat olive oil in a skillet, add mushrooms, and cook until browned (8-10 mins). Add garlic and cook for 1 min. Stir in BBQ sauce and simmer for 5-7 mins. Toast slider buns. Assemble sliders with mushrooms, pickles, red onion, and cilantro. Serve immediately.
Meet Your New Favorite BBQ Pulled Mushroom Sliders
Get ready to fire up your taste buds with these BBQ Pulled Mushroom Sliders! Perfect for summer gatherings, game nights, or just a cozy dinner, these sliders are a delicious, satisfying twist on classic BBQ. Packed with savory, smoky flavors and a satisfying texture, they’re sure to be a hit with everyone at the table.
Why Mushrooms Make the Perfect BBQ Filling
Mushrooms are the unsung heroes of the veggie world, especially when it comes to BBQ. Their meaty texture and ability to absorb flavors make them a perfect plant-based alternative. Whether you’re a vegetarian, vegan, or just looking to cut back on meat, these sliders deliver all the satisfaction of traditional pulled pork—without the guilt.
Key Ingredients You’ll Need
Before you start cooking, gather these simple yet flavorful ingredients. Each one plays a crucial role in creating the perfect BBQ Pulled Mushroom Slider.
The Star: Mushrooms
For this recipe, we recommend using a mix of portobello and cremini mushrooms. Portobellos add a hearty, meaty texture, while cremini bring earthy depth. If you’re feeling adventurous, throw in some shiitakes for an extra umami kick.
BBQ Sauce: The Heart of the Flavor
Choose a high-quality BBQ sauce that’s rich, smoky, and slightly sweet. You can use store-bought or make your own for a personalized touch. Just make sure it’s thick enough to coat the mushrooms without making them soggy.
Slider Buns: Small but Mighty
Soft, slightly sweet slider buns are the perfect vessel for these sandwiches. Look for ones that are sturdy enough to hold up to the juicy filling but still melt in your mouth.
Step-by-Step Preparation Guide
Ready to get cooking? Follow these easy steps to create BBQ Pulled Mushroom Sliders that’ll have everyone asking for seconds.
Step 1: Prep the Mushrooms
Start by cleaning and slicing your mushrooms. For portobellos, remove the stems and slice the caps into thin strips. Cremini and shiitakes can be sliced directly. The goal is to create long, pull-apart pieces that mimic the texture of pulled meat.
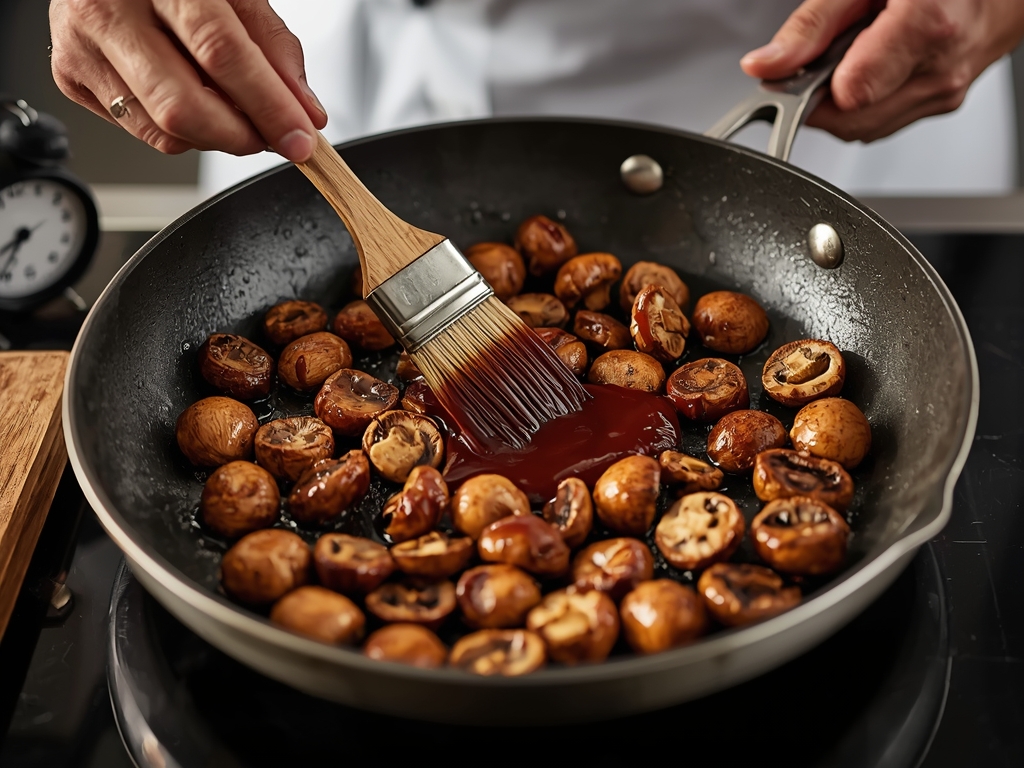
Step 2: Sauté the Mushrooms
Heat a large skillet over medium heat and add a drizzle of olive oil. Once hot, add the mushrooms and cook until they release their moisture and start to brown. This should take about 8-10 minutes. Stir in minced garlic and cook for another minute to infuse the mushrooms with garlicky goodness.
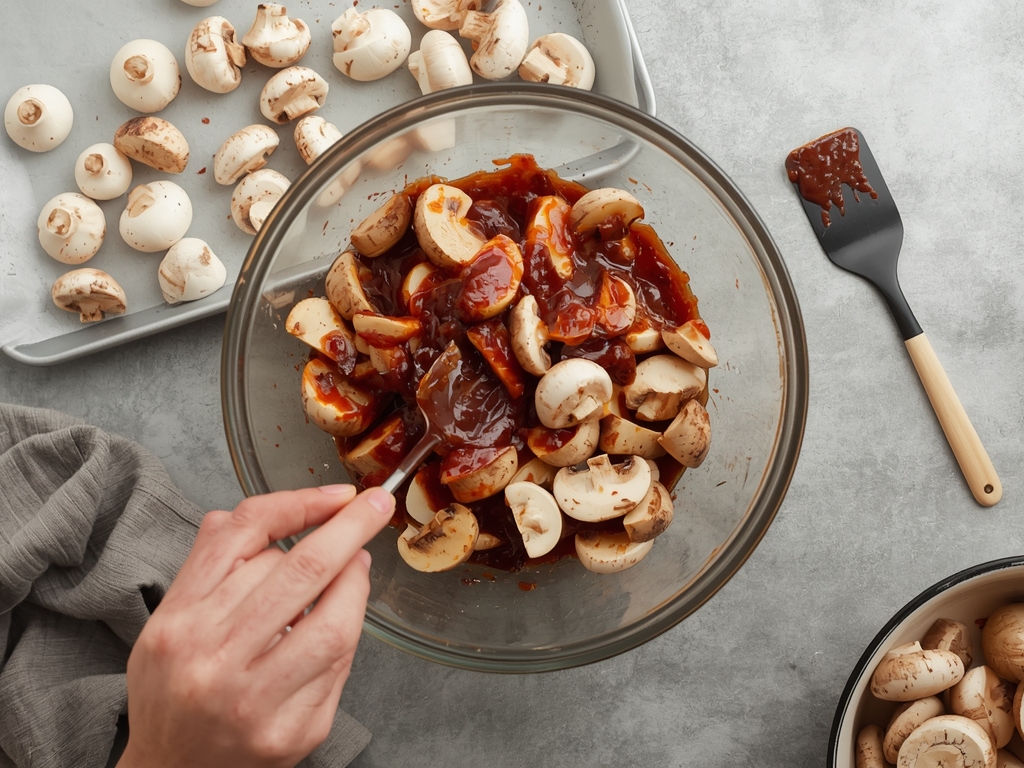
Step 3: Add the BBQ Sauce
Pour in your BBQ sauce and stir to coat the mushrooms evenly. Let the mixture simmer for 5-7 minutes, allowing the flavors to meld together. The mushrooms should become tender and absorb the smoky sweetness of the sauce.
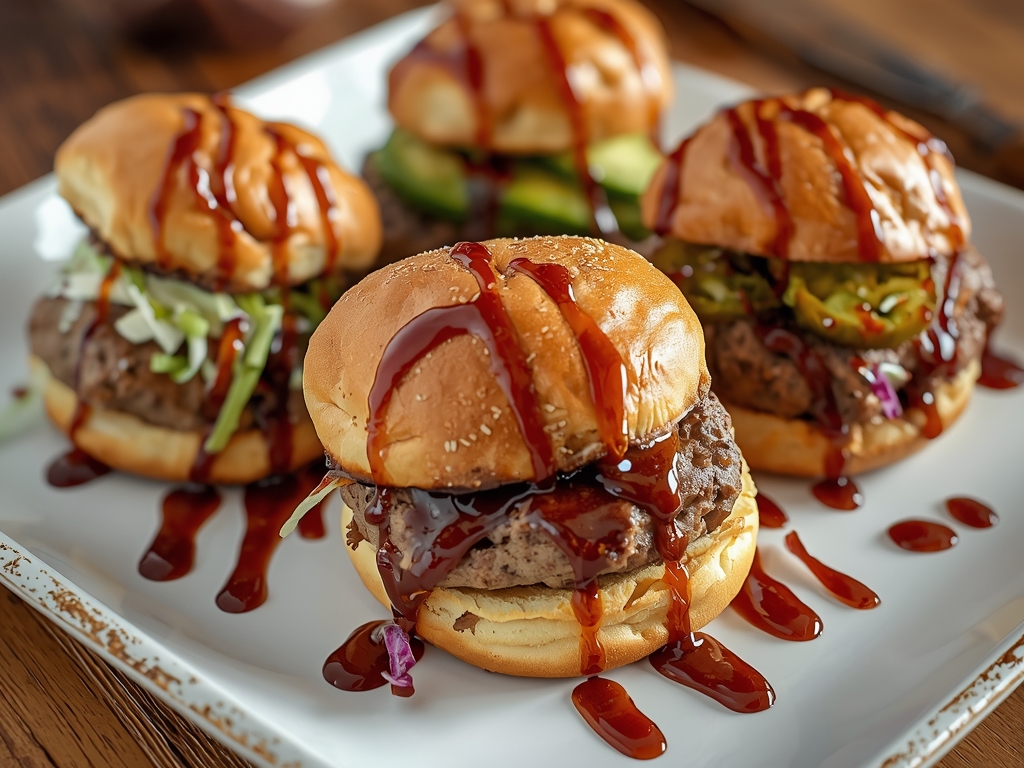
Step 4: Assemble the Sliders
While the mushrooms are cooking, toast your slider buns lightly. Once the mushrooms are ready, spoon a generous portion onto each bottom bun. Top with a slice of pickle, a thin slice of red onion, and a sprinkle of fresh cilantro for a pop of color and freshness. Crown with the top bun, and you’re ready to serve!
Creative Variations to Try
Want to put your own spin on these sliders? Here are some fun variations to keep things exciting.
- Spicy Kick: Add sliced jalapeños or a dash of hot sauce for a fiery twist.
- Creamy Crunch: Top with a spoonful of coleslaw for added texture and tang.
- Avocado Love: Layer on some mashed avocado for a creamy, healthy boost.
- Cheesy Delight: Sprinkle shredded cheddar or vegan cheese on top for a melty finish.
Serving Suggestions for Every Occasion

These sliders are versatile enough for any event. Here’s how to serve them up in style.
Game Night Snack
Set up a slider bar with all the toppings and let everyone build their own. Pair with crispy potato wedges and a cold brew for the ultimate game night spread.
Summer BBQ Side
Serve these sliders alongside classic BBQ sides like corn on the cob, baked beans, and a fresh green salad. Don’t forget the lemonade!
Party Appetizer
Skewer each slider with a toothpick and arrange them on a platter for easy grab-and-go munching. Perfect for parties where guests are mingling.
Storage and Reheating Tips
Got leftovers? No problem! Here’s how to keep your sliders tasting fresh.
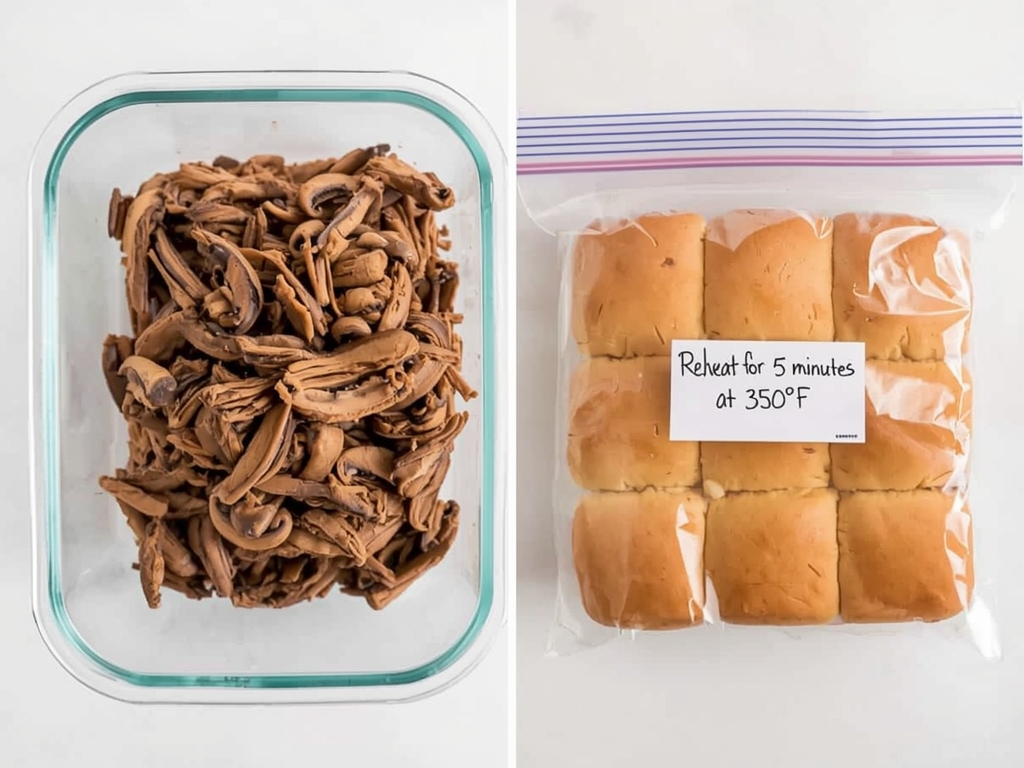
Storing the Filling
Store the pulled mushrooms in an airtight container in the fridge for up to 3 days. For longer storage, freeze them in a freezer-safe bag for up to 2 months.
Reheating Like a Pro
To reheat, place the mushrooms in a skillet over medium heat with a splash of water or BBQ sauce to prevent drying. Stir until heated through, about 5 minutes. Toast the buns separately for that fresh-from-the-oven texture.
Pro Tips for Slider Success
Want to take your sliders to the next level? Keep these expert tips in mind.
- Don’t Overcrowd the Pan: Cook the mushrooms in batches if needed to ensure even browning.
- Toast the Buns: A quick toast adds a delightful crunch and prevents sogginess.
- Balance the Flavors: Taste the BBQ sauce before adding it to the mushrooms. Adjust with a pinch of salt, pepper, or a squeeze of lemon if needed.
- Prep Ahead: Cook the mushrooms and prepare the toppings in advance. Assemble just before serving for maximum freshness.
FAQ: Your Burning Questions Answered
Can I use other types of mushrooms?
Absolutely! Feel free to experiment with oyster, maitake, or even button mushrooms. Each variety will bring its own unique flavor and texture to the dish.
How can I make these sliders gluten-free?
Simply swap out the slider buns for gluten-free ones and ensure your BBQ sauce is gluten-free. Most other ingredients are naturally gluten-free, so you’re good to go!
Can I prepare the mushroom filling in advance?
Yes, the mushroom filling can be made up to 3 days ahead and stored in the fridge. Reheat it gently before assembling the sliders for the best texture.
What’s the best way to keep the buns from getting soggy?
Toasting the buns and letting the mushroom filling cool slightly before assembling can help prevent sogginess. You can also add a lettuce leaf as a barrier between the bun and the filling.
Amara writes for the Tasty Remakes category, turning everyday leftovers into creative new dishes. Her recipes focus on practical transformations that save time and reduce food waste — proving that yesterday’s dinner can become today’s best meal.

← Previous
Healthy Dessert Recipes: 5 Guilt-Free Treats to Try
Next →
Roasted Red Pepper Antipasto Dip Recipe | Creamy & Flavorful