Follow Me On Social Media!

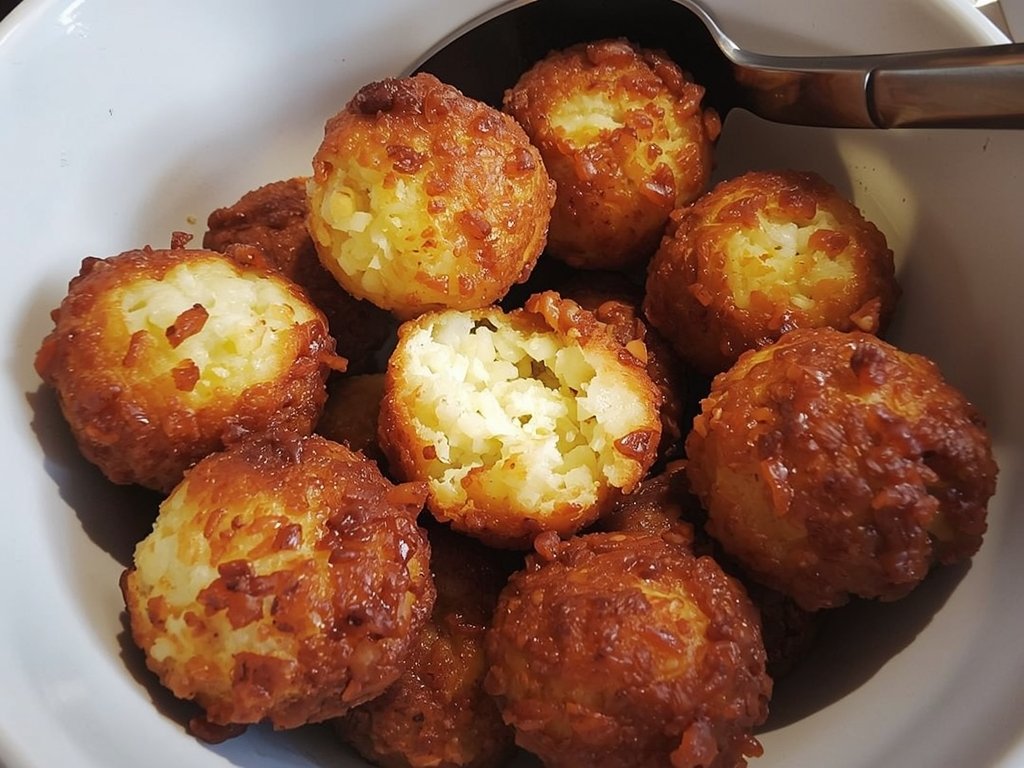
Leftover Rice Arancini Balls: A Gourmet Italian Appetizer
There is a specific kind of culinary shame associated with the Tupperware container of leftover rice sitting in the back of the fridge. It’s usually from a takeout order three days ago or a side dish for a stir-fry that you made too much of. You open the lid, and it’s not a pretty sight. The grains have clumped together into a solid, white mass. It’s hard, it’s cold, and it looks about as appetizing as a handful of pebbles. You know that if you microwave it, it’s going to turn into a gummy, sticky mess that tastes like cardboard. It’s the kind of thing you throw away just to free up the space.
But what if I told you that that sad, rock-hard block of starch is actually an untapped goldmine? In Italy, they don’t just reheat leftover rice; they worship it. They turn it into Arancini—little oranges of fried goodness. We aren’t just trying to make the rice edible again; we are going to elevate it into a gourmet appetizer that people will assume you slaved over all day. We are going to take that dry, bland canvas and paint it with egg, cheese, and breadcrumbs, creating a texture that is simultaneously crispy and creamy. It’s the ultimate glow-up for the most boring leftover in your kitchen.
The Science of the Starch Sponge
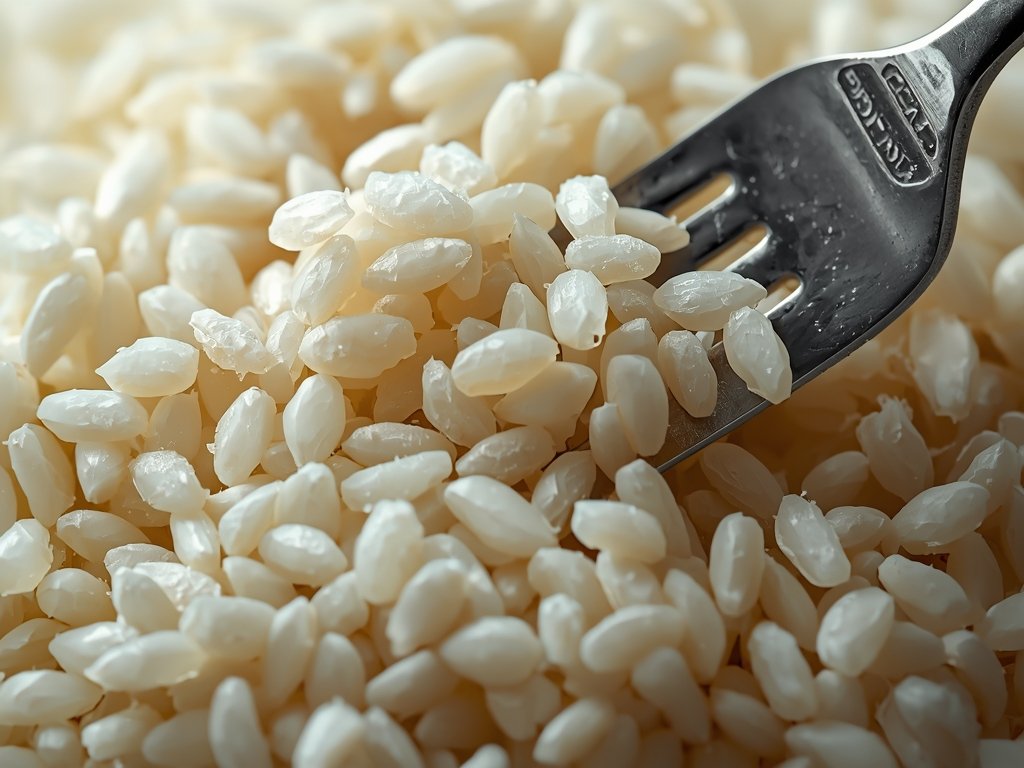
To understand why Arancini works so well for leftovers, we have to look at what happens to rice when it cools down. Cooked rice is full of starch granules that have swollen with water. When it cools, the water starts to evaporate or get trapped, and the starch molecules undergo retrogradation—they crystallize and squeeze out water. This is why leftover rice gets hard and clumpy. The grains are essentially glued together by recrystallized sugar.
Normally, this is bad news for texture. But for Arancini, this is actually a structural advantage. We want the rice to stick together. If we tried to make this with fresh, hot, fluffy rice, it would fall apart in the fryer. The dense, clumpy nature of cold rice provides the structural integrity we need to form a tight ball that won’t explode when it hits the hot oil.
The challenge is moisture. Cold rice is dry. If we just bread it and fry it, the inside will remain a hard, unappealing lump. We need to introduce a binder and a source of internal moisture that will turn into steam and creamy gooiness as it cooks. That’s where the egg and the cheese come in. They act as the mortar that holds our brick wall together, while also providing the melting, luxurious filling that contrasts with the crispy crust.
Building the Golden Shell
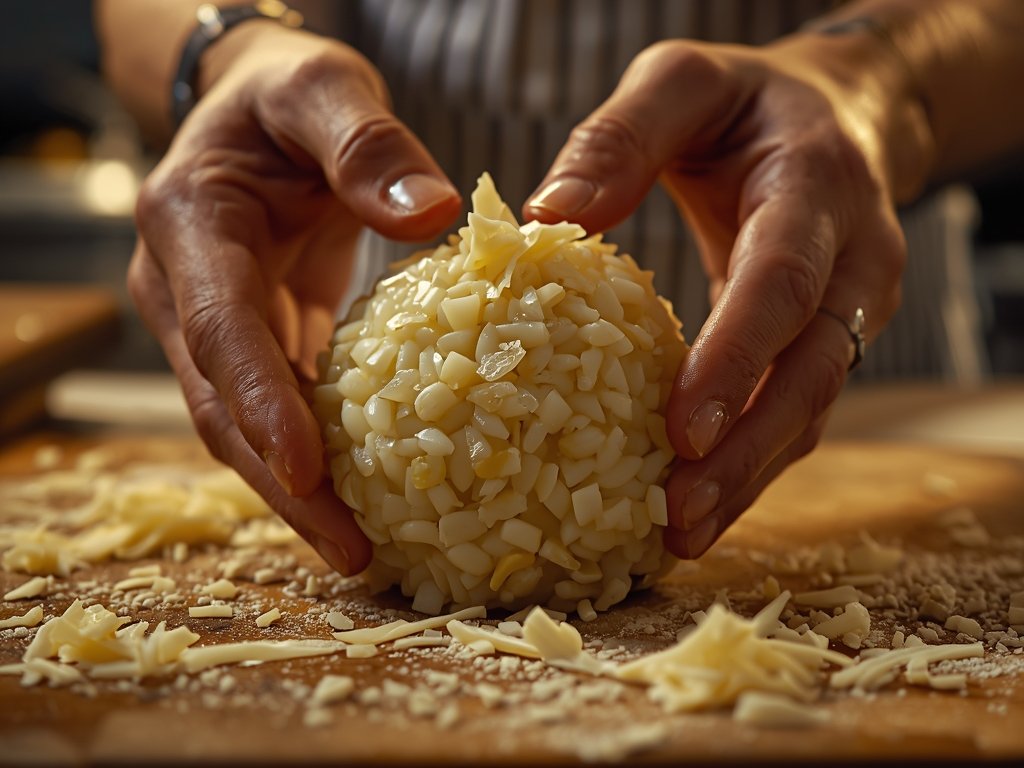
The process starts with a thaw. You can’t form balls out of frozen rock. Get the rice out and let it come to room temperature. Dump it into a bowl. Now, we have to break the clumps, but we have to be gentle. We don’t want to mash the grains into a paste; we want to separate them just enough to mix in our binders.
Crack in an egg. This is the glue. It will coat the grains and, once heated, will solidify, locking everything in place. Then, the cheese. Grated Parmesan is non-negotiable here. It adds salt, umami, and more fat that will help the rice crisp up. Mix it with your hands. Get in there. Squeeze the rice through your fingers. It should feel sticky and slightly damp, like a dough.
Now, the “Gourmet” secret: the center. An Arancini ball without a center is just a hushpuppy. We need a molten heart. Take a small cube of mozzarella—low-moisture mozzarella is best because it doesn’t ooze out too fast—and press it into the center of a ball of rice. Then, close the rice around it, squeezing tight. You want to compress the rice as much as possible. Air is the enemy. If there are air pockets inside the ball, the oil will seep in, the water will expand, and the ball will burst. Squeeze it until the grains are compact and the cheese is completely hidden.
Set up your station: flour, beaten egg, and breadcrumbs. I prefer Panko for this because those flaky Japanese breadcrumbs create an incredibly light, shattering crust that a standard crumb can’t match. Dredge the rice ball in flour (to dry the surface), dip it in egg (to make it sticky), and coat it thoroughly in Panko. Press the crumbs on. You want a thick, even jacket.
The Sizzle and the Melt
Now, the fry. You want about two inches of oil in a heavy pot—cast iron or Dutch oven—and you want it hot. 350°F to 375°F is the sweet spot. If the oil is too cool, the breading will get soggy before the rice inside heats up. If it’s too hot, the outside will burn before the cheese melts.
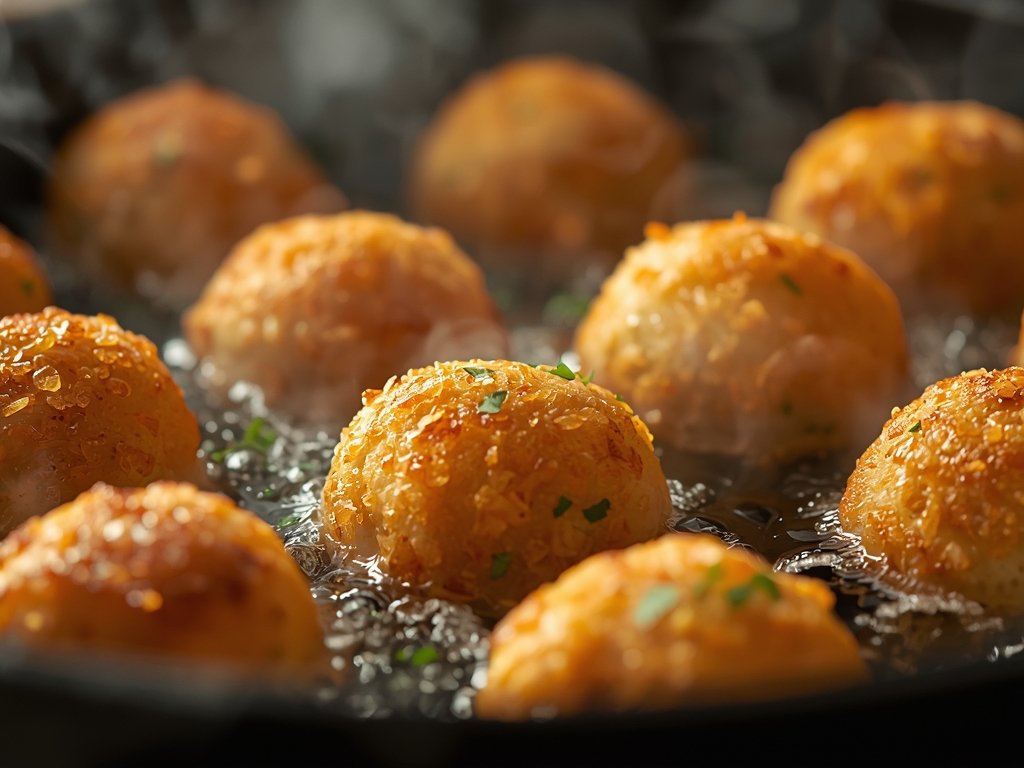
Slide the balls in gently. Don’t drop them from a height or you’ll splash hot oil. Listen to the sound. It should be a vigorous, happy sizzle, not a violent roar. That sound is the water in the breading turning to steam and escaping, leaving behind a crispy, porous lattice. Fry them for about 3 to 4 minutes. You want them to go from a pale blonde to a deep, golden brown.
As they fry, magic is happening on the inside. The heat is penetrating the rice shell. The egg binder is cooking, setting the shape. The rice on the inside is softening and absorbing the moisture from the melting mozzarella. The cheese cube turns into a pool of liquid gold. The rice on the outside, protected by the shell, steams slightly, becoming tender while the crust gets crunchier.
When you pull them out, let them drain on a wire rack. Don’t use paper towels; they’ll stick and you’ll lose that precious Panko crust. Let them rest for a minute. This is crucial. The cheese is literally lava right now. If you bite in immediately, you will burn your tongue, and you’ll miss the contrast in temperatures. You want the inside to be hot, but not scalding, so you can actually taste the rice and the cheese.
The Flavor Bomb Upgrade
We have the texture—crunchy outside, soft rice, gooey cheese. But we can push the flavor profile from “good” to “gourmet” with one simple aromatic addition. Leftover rice is bland. Even with Parmesan, it needs a wake-up call.
Before you form the balls, take a lemon. Zest it directly into the rice and egg mixture. Don’t be shy. The lemon zest cuts through the heavy starch and the rich cheese, adding a bright, floral note that makes the balls taste light despite being fried. It also makes the aroma in the kitchen intoxicating.
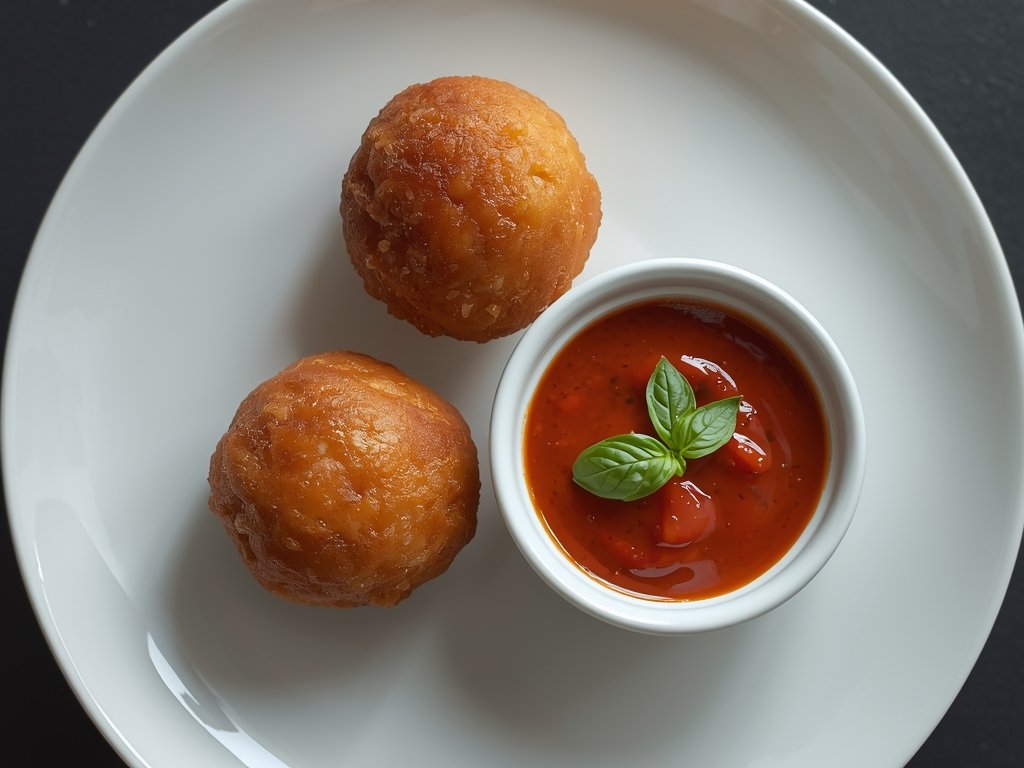
And for the serving vessel? Don’t just serve them on a plate. Make a quick Arrabbiata sauce—just canned tomatoes, garlic, red pepper flakes, and olive oil, simmered for 15 minutes. It takes five minutes of prep and elevates the dish entirely. The acidity of the tomato and the heat of the chili flakes cut right through the fried exterior.
When you eat it, you break through the shattering Panko crust, hit the soft, lemon-scented rice, and then hit that explosion of melted mozzarella. Dip it into the spicy sauce, and you have a symphony of textures and temperatures. It’s crispy, creamy, soft, chewy, hot, and spicy all at once. You didn’t just use up leftover rice; you created a restaurant-quality appetizer that people will beg you to make again.
Frequently Asked Questions
My leftover rice is plain white rice. Will this still work?
Yes, perfectly. In fact, plain white rice is often the best base because it acts as a blank canvas. The Parmesan, the mozzarella center, and the lemon zest provide all the flavor you need. Just make sure you season the rice mix with a good pinch of salt and pepper since the rice itself has none.
Can I bake these instead of frying them? You can, but be warned: they won’t be true Arancini. Baking them will make them dense and the crust will be tough rather than crispy. If you must bake, spray them heavily with olive oil spray and bake at 400°F for about 20-25 minutes, turning halfway through. They will be tasty, but they lose that “light and airy” crunch that defines the dish.
Can I freeze uncooked Arancini balls? Absolutely. This is a great make-ahead appetizer. Assemble the balls completely (breaded and all), then place them on a baking sheet in the freezer until they are solid. Transfer them to a freezer bag. When you’re ready to eat, fry them straight from frozen—just add an extra minute or two to the frying time. Do not thaw them first, or the breading will get soggy and fall off.